Whether you already know about templates or you’ve never heard of them, Today we are going to teach you everything you need to know and show you the steps to create your own Microsoft PowerPoint template and how to save it to use for your future projects.
Open a Blank Presentation
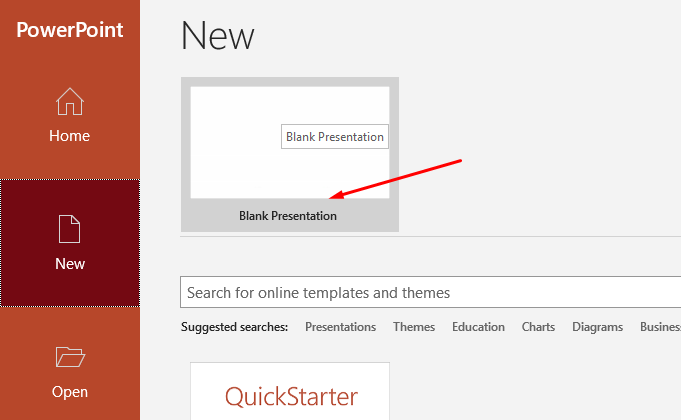
To create a custom PowerPoint template, you’ll first need to open a blank presentation. You can do so by clicking the “File” tab and then selecting “New” in the left pane.
A large library of templates will appear and you can also download more beautiful templates from templates.office.com, but since that’s not what we’re looking for, just go ahead and select the “Blank Presentation” option.
Customize slide orientation and size
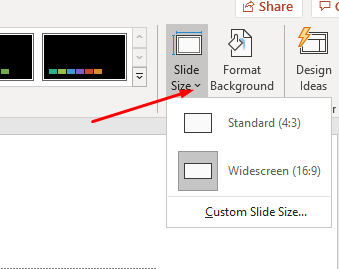
You need to choose the slide orientation and size for the template you are going to create. In the “Customize” group of the “Design” tab, select the “Slide Size” button. A small drop-down menu will appear. Here, click the “Customize Slide Size” option. The “Slide Size” dialog box will appear.
Here, you can:
1: adjust the slide height and width or simply select a predefined option from the drop-down menu, and
2: select the slide orientation.
Slide Master
The rest of the template creation will be done in PowerPoint’s Slide Master. Everything you change there will directly affect all the other slides. You can try it out by setting a different background color for the Slide Master. The other slides will immediately change colors, too. The Slide Master allows you to customize a presentation’s fonts, headings, and colors in one place, applying the selections to all of your slides. This allows you to maintain consistency throughout the template, and eliminate the need to make changes to each individual slide.
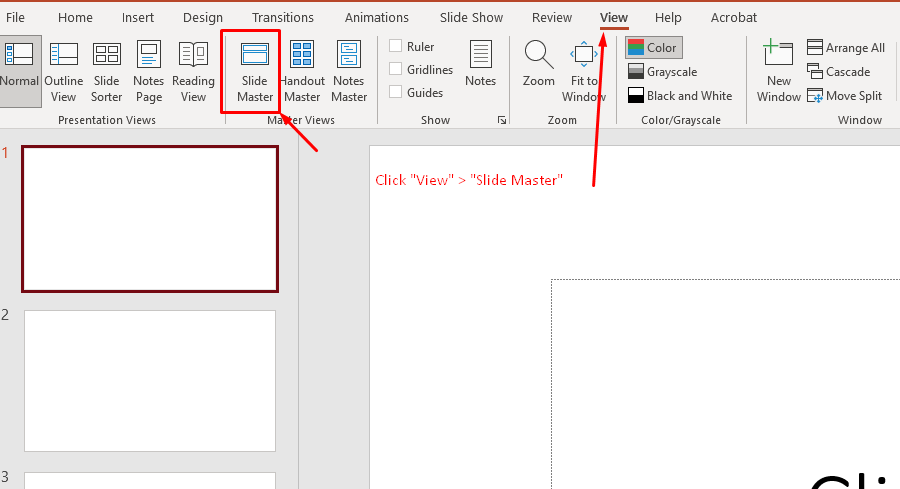
On the View tab, in the Master Views group, choose Slide Master.
The Slide Master is the top thumbnail that appears in the pane. Each sub-thumbnail represents each slide layout available in your theme. Edits you make to the Slide Master will affect each slide layout.
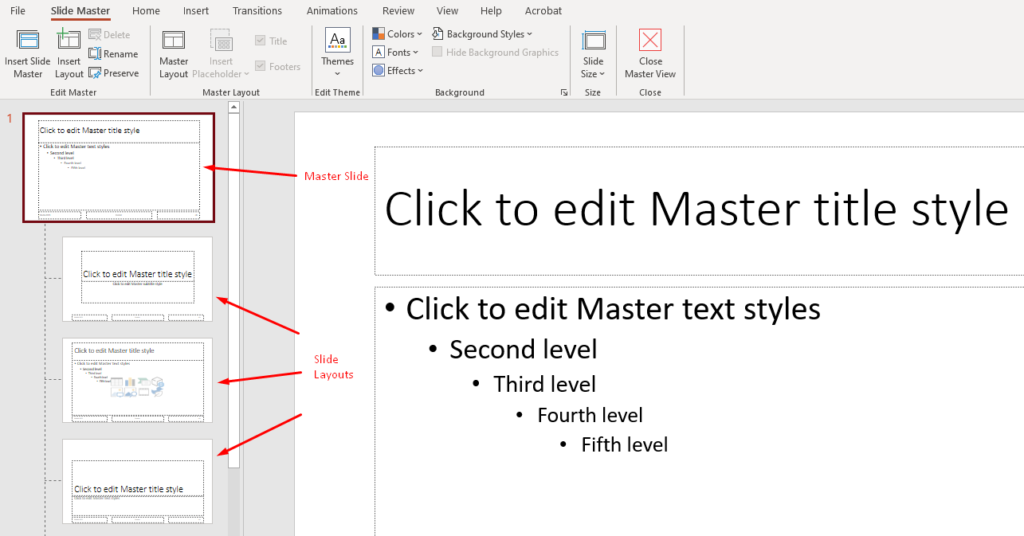
Here’s a list of things you can/should change:
- Colors: Go to Colours and choose either one of PowerPoint’s predefined palettes or create your own one.
- Fonts: Click Fonts and then Customise Fonts and choose styles for your titles and regular text.
- Background: Go as crazy-creative or minimalistic as you want. Change the background color, maybe add some shapes, or look for a nice image online that works behind your text. (To do so, right-click on your main slide and go to “Format Background”)
- Title: Change the size, style, and placement of the title, simply by editing it as you would usually do.
- Text Style: Do the same for your regular text boxes. Define what the bullet points should look like.
- Footer: You can switch the footer elements around, replace them and change them like any regular text.
- Placeholder: You can choose from a variety of placeholders. They can be very helpful because they predefine where a certain element (e.g. image, video,…) should be placed in the presentation.
Save Your Custom PowerPoint Template
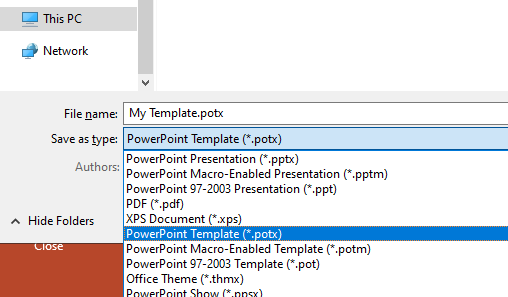
When you’re finished designing your custom PowerPoint template, you can save it by going to File > Save as. Choose the folder you want to save it to and then, save it as PowerPoint Template (*.potx) instead of saving it as a presentation.
Enjoy!
Thank you and if you are looking for a PowerPoint design expert to create a beautiful presentation, Contact us Now for the best price!
